Last reviewed and updated: 10 August 2020
I love using virtual machines for test systems. Particularly during ramp up at the start of a development project, where I’m constantly rebooting (and, ahem, corrupting…) systems with my first attempts at getting my code working. They also make great test specimens for my various experiments. Just today I was wondering if a particular bug found on Windows 8.1 is also present on Windows 7 and Windows 10. A few clicks later and I had my answer (yes, it is).
For all that I love debugging with VMs, there is one thing that I absolutely hate: KD debugging with virtual COM ports. Specifically in the case of VMware Workstation, which is what I use for my day to day virtualization needs, it’s painfully slow. Even worse, the virtual COM port doesn’t quite mimic the behavior that WinDbg expects from a real COM port. This leads to more than the occasional WinDbg hang or crash.
Thankfully, starting in Windows 8 there is a new way to solve this problem: KD debugging over Ethernet! Instead of piping a virtual COM port over a named pipe to the host, we can use a network connection between the guest and the host to shuttle our KD traffic. This feels much more responsive than the virtual COM port route, and overall provides a much more pleasant debugging experience (though sadly not as good as using a 1394b card on a physical machine).
Unfortunately, the following only works if you’re debugging target VMs running Windows 8 and later. For targets running earlier versions of Windows, your best bet is still VirtualKD. Also note that the directions specified here are specific to VMware Workstation, YMMV with other virtualization solutions.
Step 1: Establish a network connection
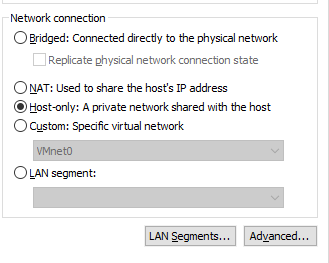
The guest is going to need access to the host via Ethernet. You can configure this any way you like, but in our case we’re going to debug over a private network with the host. Figure 1 shows the connection settings that we used.

Step 2: Locate host IP address
We’ll need to specify the host IP address when configuring our debug session. By default, if you’re using a VMware host only network the host IP is at address .1 on the guest’s subnet.
Using ipconfig (not shown), we determine that the guest IP is 192.168.154.129. This means that our host IP address will be 192.168.154.1.
Step 3: Use kdnet.exe to configure debug settings
The Windows 10 release of the Debugging Tools for Windows package contains kdnet.exe, which is an awesome utility that makes it dead simple to configure network debugging. Included with this utility is the file VerifiedNICList.xml, which contains a list of all NICs known to work with KD network debugging.
Running kdnet.exe by itself to verifies that the virtualized NIC being used is on the verified list. In Figure 2, we can see that we are running with a supported NIC.

Now, all that’s left is to enable debugging. kdnet.exe takes as arguments the IP address of the host and the port number to use for debugging. In this case, we’ll specify 192.168.154.1 as our host and 50000 as our port (which happens to be the default). The result of this command will be an encryption key that we’ll need to specify in our host connection settings, as seen in Figure 3.

Now reboot the machine, you’re done configuring the guest!
Step 4: Configure WinDbg
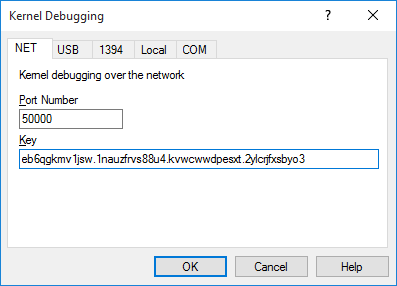
On your host machine, launch WinDbg and bring up the Kernel Debugging connection dialog (Ctrl+K). Under the NET tab, enter in the port number used as the debugging port (50000 in this case). Under Key, specify the key that was generated by the kdnet.exe command. You can see our settings in Figure 4.

The final thing to do is click OK and connect to the guest!
Step 5: Success!
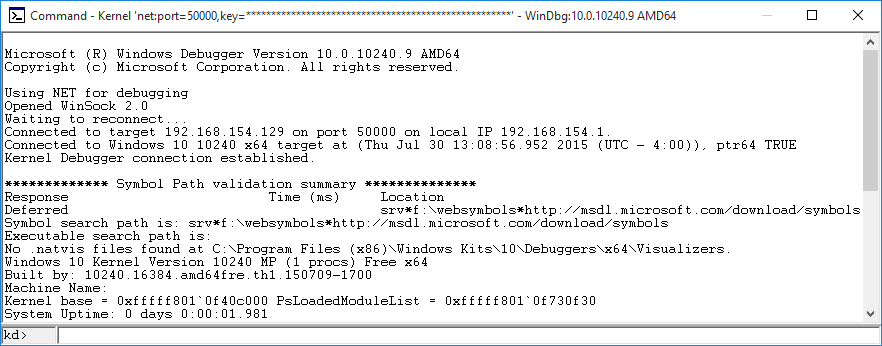
If you’ve configured everything properly up to this point, you should be greeted with your familiar connection message from WinDbg (Figure 5).

But What About Boot Debug?
In the above steps, we’ve only enabled normal kernel debugging. Sometimes it’s necessary to enable boot debugging, for example, to allow you to load an unsigned boot start driver. The thing to remember is network boot debugging requires an EFI BIOS and is not supported with a traditional PC-AT BIOS. Other than that, you should be all set.

[…] 實際操作可以參考 OSR 的這篇文章 KDNET Debugging […]